How to Create a Collaboration/Roundup Blog Post

***DISCLAIMER: There are affiliate links in this post and I might receive a small commission. I only share tools that I use regularly and love. Thank you so much for your support!***
A few months ago I was included in this roundup post, 22 Awesome Blogs to Help Creative Entrepreneurs Grow Their Business from Melanie at CopyRefresh.
I remember that I was leaving the gym and my notifications were going off like crazy… and then I had this email:
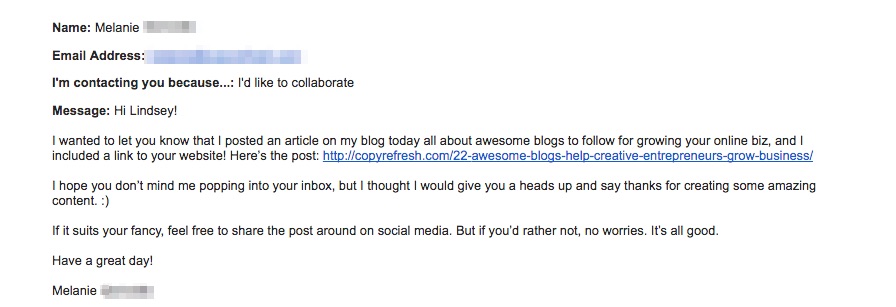
I was so excited!! So excited that I posted this in my own group, Creative Biz Haven.

I’ll never forget how happy this made me feel and I knew that one day I wanted to create a post similar to share the love and provide value to my audience as well.
Enter my Lessons Learned blog series...


Creating a series from the questions that I asked allowed me to add in more posts to my blog, connect with other creative business owners and grow my traffic.
Before you decide on if you want to create your own collaboration/roundup post you should decide if you’re going to create a collaborative post or a roundup post.
A collaboration post is where you collaborate with others to create a blog post. For example, you ask the questions, organize all of the answers, create the post and share it.
A roundup post is where you do all of the work and include others words/photos in your own post but then credit them back.
My Lessons Learned series was a mixture of both and there were a lot moving parts to put it together so to make this easier for you, I'm going to share with you the steps that I took.
Want to create your own collaboration blog post?
Grab your checklist by entering your information below!
Here’s how you can Create your Own Collaboration/Roundup Blog post:
1. Choose your topic.
Determine what you're going to talk about before asking others for information but pick something that relates to what you do.
For instance, I teach creative business owners how to use the tools to grow their audience online so I created a series asking a few questions related to that.
It would not have made any sense if I asked questions about food because that's unrelated to my business. Of course, I love food but it's not related to what I blog about! ☺️
2. Identify which questions you're going to ask.
I asked the collaborators THREE questions, and then turned their answers into three separate blog posts to form a series. You can ask as little questions or as many as you like, but I suggest keeping it under five to make it easier on yourself and your contributors.
3. Create a Survey to Gather Information for your post or series
I used the FREE plan from Typeform to create my survey but you could use whichever survey platform you prefer to use. Other great survey tools include SurveyMonkey and Google Forms.
Here's what my survey looked like:

Be sure to ask these questions within your survey:
What is your first name?
What is your business name?
What is your website url?
What is your email address?
By asking these questions in your survey you will save time and be able to use their information in the blog posts or when you need to followup with them as well. No need to email back and forth afterwards!
Here's an Example from this post: 15+ Creatives Reveal How To Grow An Audience Online When You're Struggling

4. Send your Survey to a few collaborators/contributors
This is where you can be strategic with who you send your survey to. For instance, for mine, I emailed about 10 other creative business owners that I want to build a relationship with. I also shared this within my Facebook group to collaborate with some of the people in my audience.
This is what I emailed, feel free to use this swipe copy as an example but change the wording so it sounds like you!
Hey, there!
I'm compiling a blog post for lessons learned on growing an audience online and I'd love to know what you would say. If you're interested in contributing to this blog post, please click here to fill out the quick survey:
If you could do this before July 21st, I'd appreciate it! Thanks so much!
Cheers!
Lindsey
This is what it looked like on my Facebook group:

5. Give your contributors a deadline
You want to give your contributors a deadline so they have urgency to fill out your survey in a timely manner. This will also help you prepare for when you will add the posts into your content calendar.
I gave people a week and that was plenty of time for them and myself!
6. Remind your contributors about deadline
Shoot a quick email to the ones that you really wanted to contribute and remind them about the deadline.
This can be a quick, "Hey just wanted to see if you were interested in contributing, if so the deadline is this Friday, before noon CT." or whatever terminology makes sense for you.
Most people wrote back with "oh sorry about that, I'm doing it right now, thanks!"
If some of them didn't reply, that's okay too but I kept a note in my potential collaboration trello board of it in case I wanted to connect with them in the future. I also created this post during the summer and understand that most are really busy then. Be mindful of that when you're planning yours as well.
7. Write blog post or create a series.
Now that you have all of your copy and information you can go ahead and write your blog post or create a series.
Like I mentioned above, I created a series because I had over 15 contributors answer three questions and it was easier for me to split it up into three separate blog posts as a series instead of one long blog post. My blog posts were still long but I figured that would just help with my SEO so I'm okay with it!
Remember, it's completely up to you for how you want to proceed but whatever you do, don't make it hard on yourself!
8. Publish the blog post.
After you have compiled everything together in a post and gone through your usual blog posting routine, hit publish on the post! Yay you did it!
Now you need to share it on social media and with your contributors, but don't worry, I'm going to walk you through those steps as well.
9. Share post on social media + gather links.
After hitting publish you want to share the post to your own social media first. You want to do this so you can grab the links to send out to your contributors.
By using your own social media links you will be able to grow your OWN traffic by having your contributors share YOUR links.
First, pin your post to your website board on Pinterest.
The first board that I have on my Pinterest account is: hazelhaven.com this helps new followers know that my website is hazelhaven.com and these are my most recent posts. Each time I hit publish on a new post, I pin it to this board before adding it to my Tailwind.
Once you have pinned your post, grab the link to the pin. For instance the link for this one was: https://www.pinterest.com/pin/36943659427221098/
Second, create a post on Facebook from your business page and tag everyone who contributed.
If you want to get fancy, you could create a youtube video or instagram post as well. For this one below, I utilized anchor.fm and read my own answers out loud for the series to drive more traffic to the series on my site.
Lastly, create a click to tweet to the blog post.

Once someone clicks on your click to tweet link like this: https://ctt.ec/fc_0c they will see your prewritten tweet as shown below.
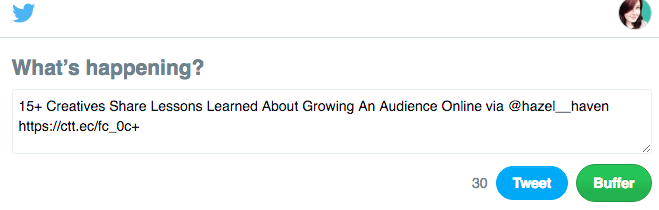
Grab all of your social media links and get ready to add them to your email.
10. Send email to your contributors to notify them that the post is live.
This is what I emailed, feel free to use this swipe copy as an example but change the wording so it sounds like you!
Hey there
!
I wanted to let you know that the third and final collaboration post is LIVE. I included your answer as well as a link to your website!
Here’s the post:
http://www.hazelhaven.com/blog/how-to-grow-audience-online-when-struggling
I thought that I would give you a heads up and say thank you SO much for adding your input for my series.
Feel free to share the post around on social media:
Pin this!
Click to tweet!
Share on Facebook!
If you have any questions, just hit reply and let me know.
Thanks again for contributing and I hope you're having a good week!
Cheers!
Lindsey
P.S. If you are interested in having a coffee chat with me sometime, then feel free to grab a time that's convenient for you here!
Here's the example:

1. Title your Email Subject with the name of your post or series.
2. Include the link to your post.
3. Include the social media links that you saved earlier so it's easy for your contributors to share.
4. EXTRA CREDIT: Ask collaborators to connect via a coffee chat to take your new relationship deeper.
Instead of copying and pasting each email, you can create a canned response in a program like Gmail (Read: How to Set up Canned Responses in Gmail) or Dubsado.
Canned responses do make things easier but only if you use them regularly. If you don't know how to use a canned response, don't worry about it for this exercise. Work smarter, not harder.
11. Add share links to email to make it easy for your collaborators to share with their audience.
Remember those links you grabbed earlier? Insert them into your email so your contributors can share them easily with their audience.
You might even receive emails like this in return:

Now, of course you don't have to spend this much of an effort on your collaboration/roundup blog post and I do realize that I went a little above and beyond with this one. However, if you're looking to grow your audience online, connecting with others is the ONE thing that I wish that I would have done sooner with my creative business. So here's your reminder, put yourself out of your comfort zone, and connect with others beyond social media! You'll thank me later!
EXTRA CREDIT
Add posts to scheduling tools to have them post consistently to get more traffic to your posts.
I LOVE using SmarterQueue for sharing my posts on social media without me having to be online all of the time. Learn how I save time and grow my audience with SmarterQueue here.
Tailwind is another tool that I am head over heels for, I've grown my blog traffic by 300% in the past few months with Tailwind. Read The Ultimate Guide To Using Tailwind For Pinterest.
Take it a step further and create a video like the one below or audio file with an app like Anchor.fm like I did here.
Want to create your own collaboration blog post?
Grab your checklist by entering your information below!


Over to you – tell me if you've ever created a collaboration roundup post!

Hey there, I'm Lindsey the online educator behind hazelhaven.com. I help online business owners create video content with confidence. I'm an introverted extrovert who loves tech systems, dark chocolate and a strong cup of coffee. Be sure to follow me on YouTube here.


Leave a comment